Dedicated endpoints
A dedicated endpoint corresponds to a running instance of an AI model, exposing itself as a HTTP server. Any service can be run as a dedicated endpoint, the most common use case is to deploy an AI model, exposed with an OpenAPI.
Create Dedicated Endpoints
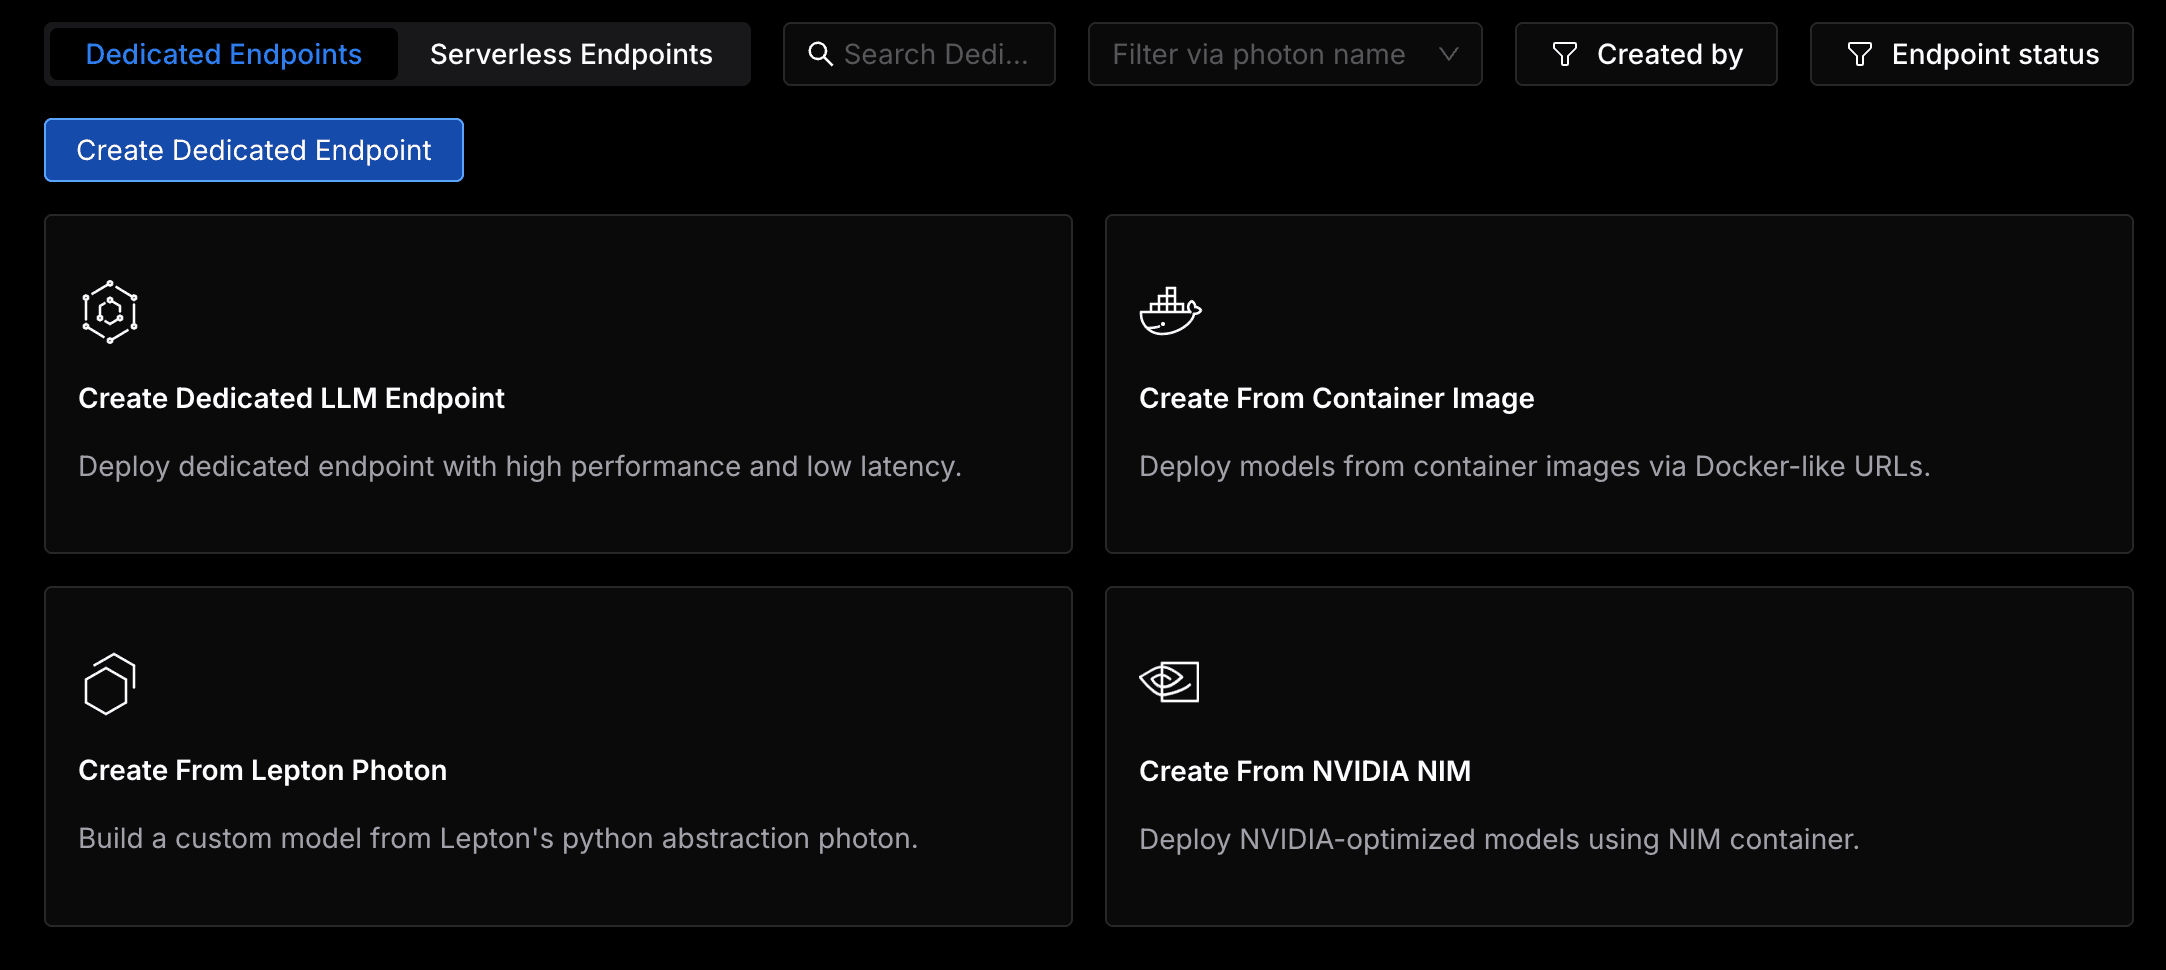
A dedicated endpoint can be created in four different ways, checkout the following guides for more details:
- Create Dedicated LLM Endpoint
- Create from Container Image
- Create from Lepton Photon
- Create from NVIDIA NIM
Configuration Options
Lepton provides a number of configuration options to customize your dedicated endpoint.
Environment variables and secrets
Environment variables are key-value pairs that will be passed to the deployment. All the variables will be automatically inject in the deployment container, so the runtime can refer to them as needed.
Secret values are similar to environment variables, but their values are pre-stored in the platform so it is not exposed in the development environment. You can learn more about secrets here.
You can also store multiple secret values, and specify which secret value to use with the --secret flag like the following:
Inside the deployment, the secret value will be available as an environment variable with the same name as the secret name.
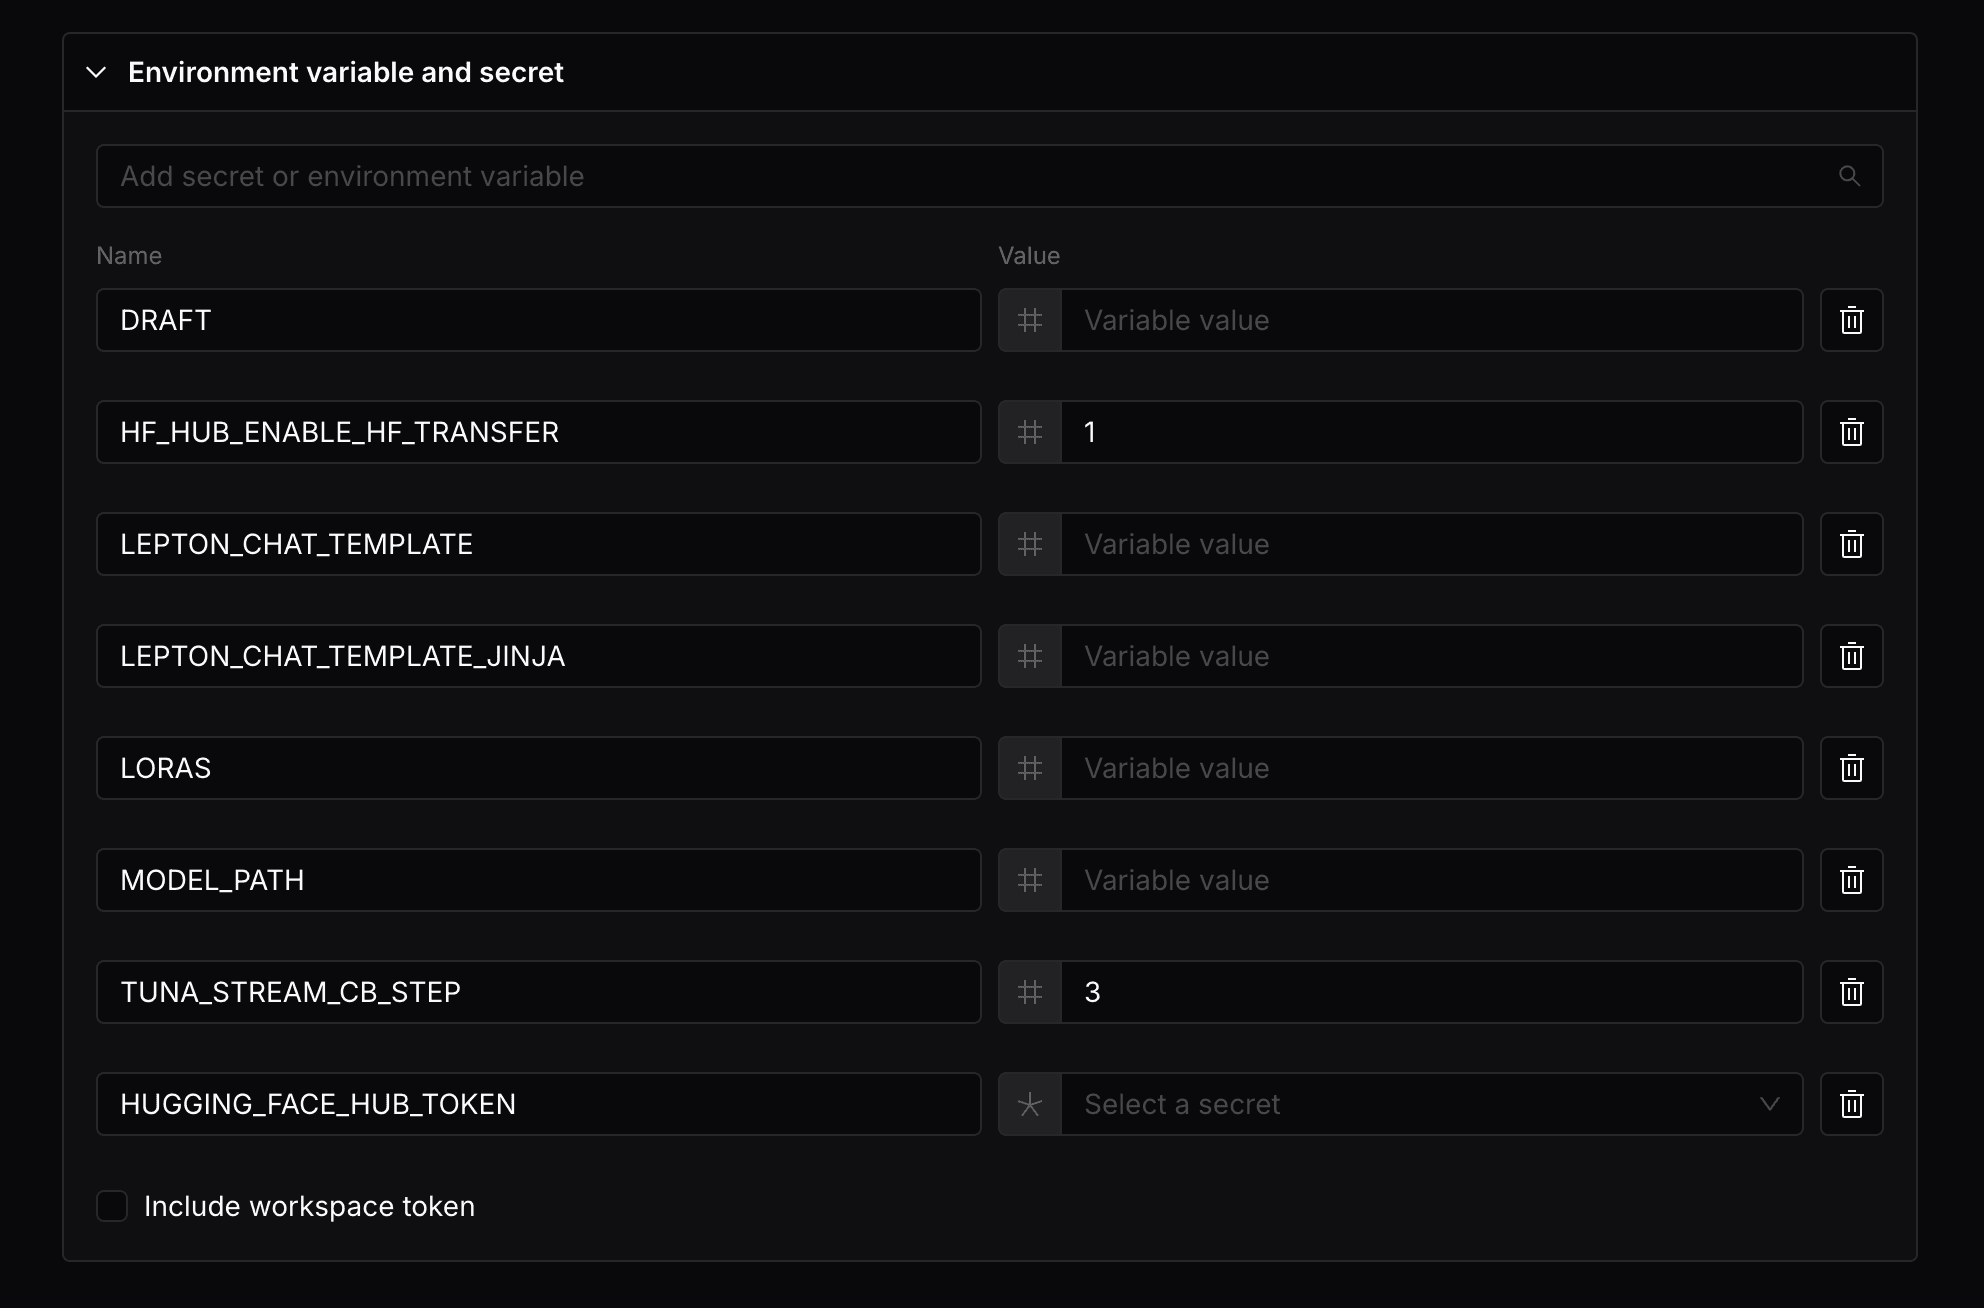
Your defined environment variables should not start with the name prefix LEPTON_, as this prefix is reserved for some predefined environment variables.
The following environment variables are predefined and will be available in the deployment:
LEPTON_DEPLOYMENT_NAME: The name of the deploymentLEPTON_PHOTON_NAME: The name of the photon used to create the deploymentLEPTON_PHOTON_ID: The ID of the photon used to create the deploymentLEPTON_WORKSPACE_ID: The ID of the workspace where the deployment is createdLEPTON_WORKSPACE_TOKEN: The workspace token of the deployment, if--include-workspace-tokenis passedLEPTON_RESOURCE_ACCELERATOR_TYPE: The resource accelerator type of the deployment
Access tokens
By default, your dedicated endpoints will be protected with your workspace token, meaning that only requests with the workspace token in header will be allowed to access the endpoint. If you want to allow public access to the endpoint, you can also toggle the Enable public access option, this will create a endpoint whose HTTP service is publicly accessible.

Alternatively, you can specify a token that can be used in addition to the workspace token to access the endpoint. This will create a endpoint that can be accessed with the workspace tokens that you specified.
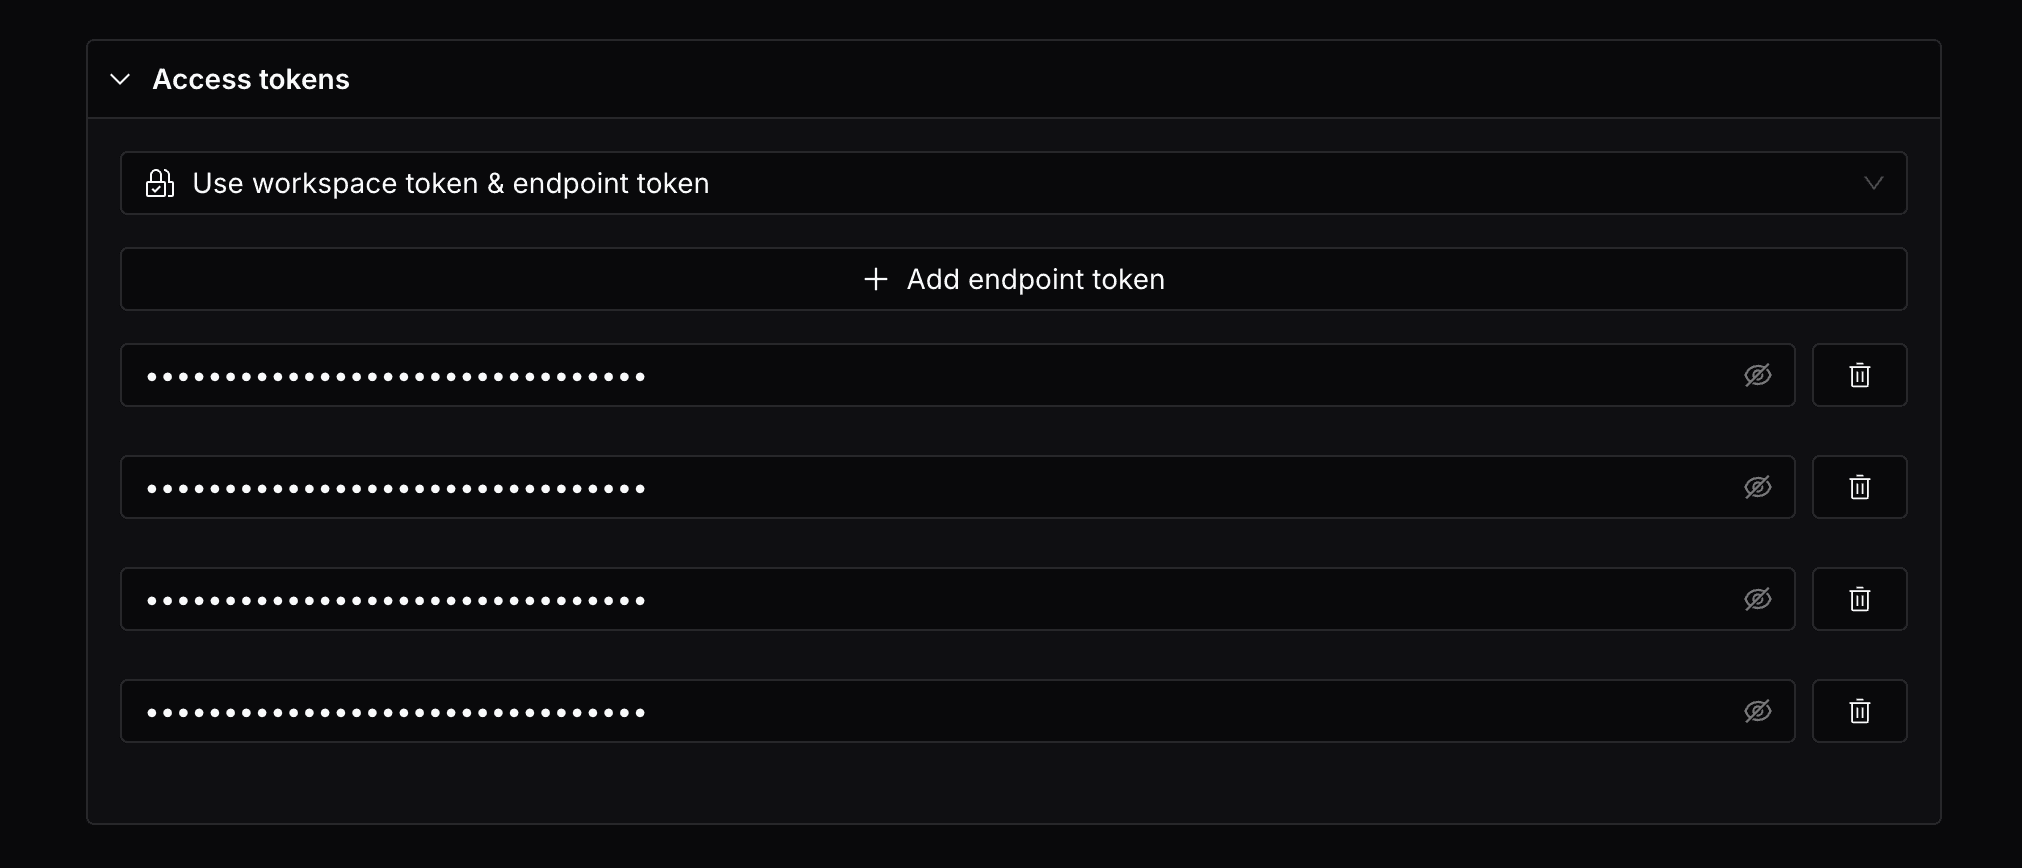
The workspace token will always be allowed to access the endpoint, in addition to the tokens specified.
Resource shapes
Resource shapes are the instance types that the endpoint will be run on. You can select the resource shape in the endpoint creation page.
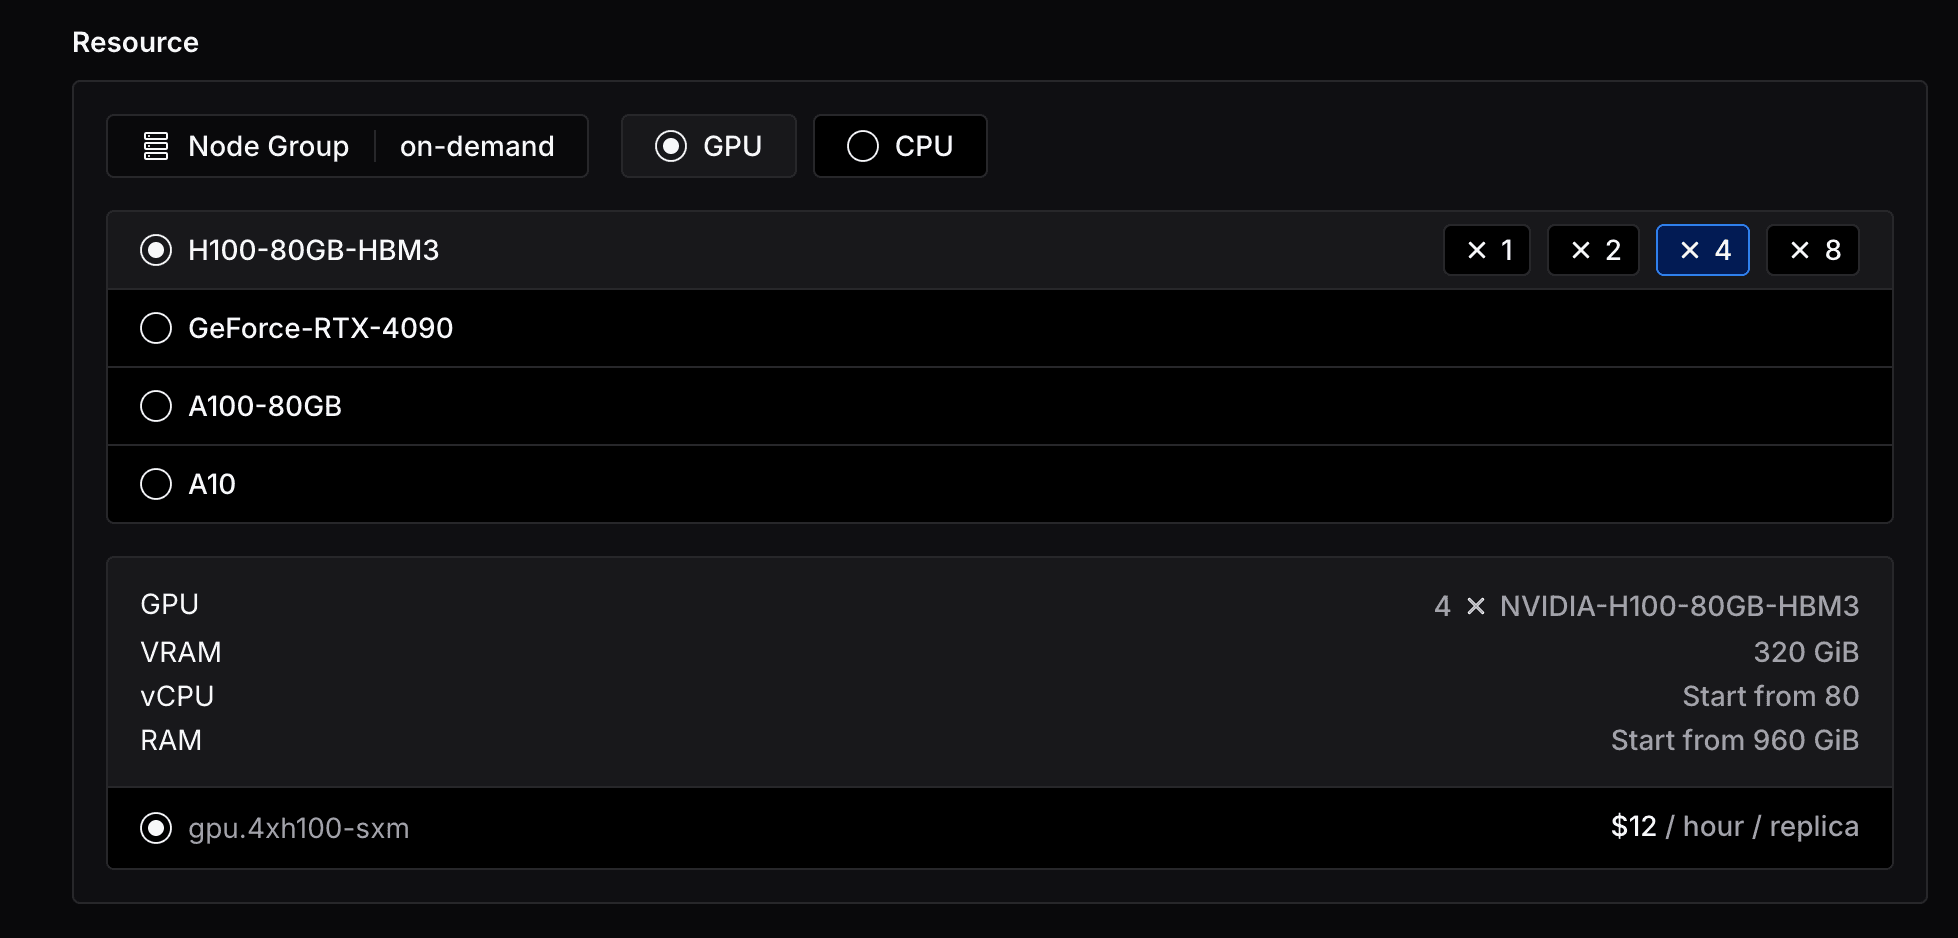
As you can see, you can select from a variety of CPU and GPU shapes, and the number of GPUs you want to use. And you will see the pricing of the resource shape you've selected, calculated by the number of minutes you are billed for.
Enterprise users can have access to more resource shapes and node groups, contact Lepton support for more information.
Autoscaling
The autoscaling feature currently does not support arbitrary container based deployments. It is only available for photon based deployments.
By default, Lepton will create your endpoints with a single replica and automatic scale down to zero after 1 hour of inactivity. You can override this behavior with the three other autoscaling options and related flags.

- Scale replicas to zero based on no-traffic timeout: You can specify the initial number of replicas and the no-traffic timeout(seconds).
- Autoscale replicas based on traffic QPM: You can specify the minimum and maximum number of replicas, and the target QPM. You can also specify the query methods and query paths to include in the traffic metrics.
- Autoscale replicas based on GPU utilization: You can specify the minimum and maximum number of replicas, and the target GPU utilization.
We do not currently support scaling up from zero replicas. If a deployment is scaled down to zero replicas, it will not be able to serve any requests until it is scaled up again.
File system mount
Lepton provides a serverless file system that is mounted to the deployment similar to a local POSIX file system, behaving much similar to an NFS volume. The file system is useful to store data files and models that are not included in the deployment image, or to persist files across deployments. To read more about the file system specifics, check out the File System documentation.
To mount a file system to a deployment, you can click on the Add File System Mount button in the File System Mount section.

For example, this will mount the root of the lepton file system (/) to the deployment replicas, and are accessible at /leptonfs in the deployment container.
You can operate on the file system as if it is a local file system, and the files are persisted across deployments.
Make sure that you are not mounting the file system as system folders in the deployment, such as /etc, /usr, or /var.
Also make sure that the mounted path does not already exist in the container image.
Both cases may cause conflicts with the guest operating system.
Lepton will make a best effort to prevent you from mounting the file system to these folders, and we recommend you double check the mounted path.
As a general rule, similar to other distributed / network file systems, you should avoid concurrent writes and other operations that may lead to race conditions. Consider using UUIDs or other mechanism to avoid conflicts.
Advanced Topics
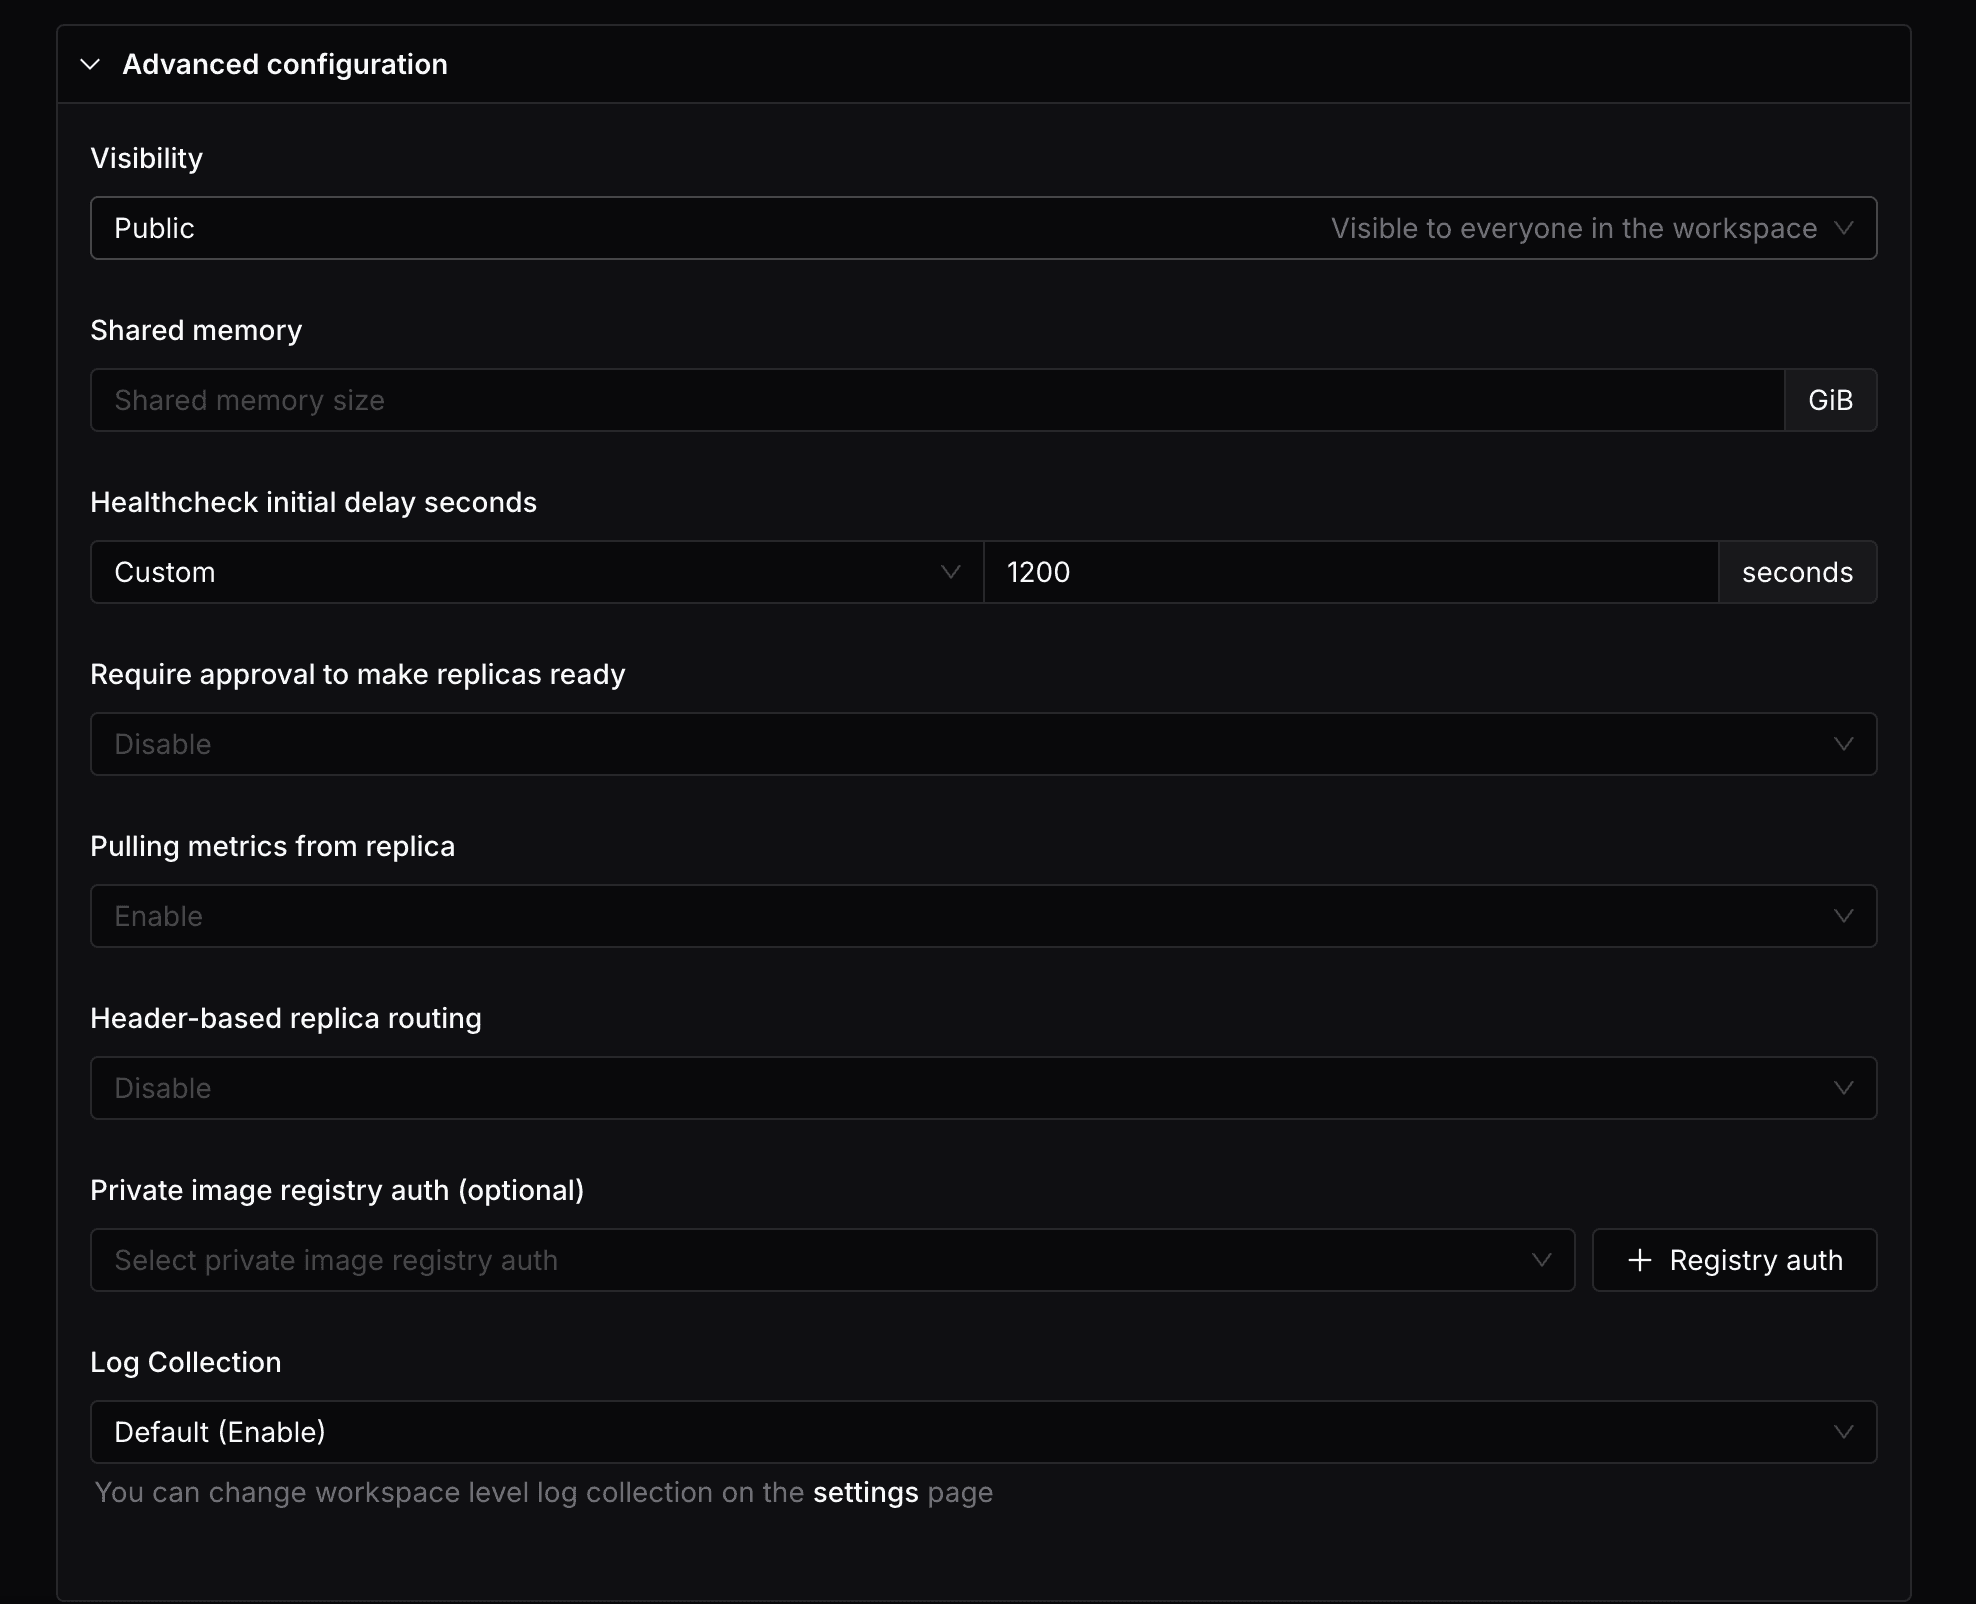
Deployment visibility
By default, the endpoint is visible to all the team members in your workspace. If you want to restrict the visibility of the deployment, you can simply switch the Visibility option in the Advanced section.
This will make the endpoint only visible to the user who created it and the admin. Other users in the workspace will not be able to see it.
You can also update the visibility of the deployment later in the deployment details page.
Shared memory
You can specify the shared memory size for the deployment in the Advanced section.
Healthcheck initial delay seconds
By default, there are two types of probes configured:
- Readiness Probe: Starts with an initial delay of 5 seconds and checks every 5 seconds. It requires 1 successful check to mark the container as ready, but will mark the container as not ready after 10 consecutive failures. This probe ensures the service is ready to accept traffic.
- Liveness Probe: Has a longer initial delay of 600 seconds (10 minutes) and checks every 5 seconds. It requires 1 successful check to mark the container as healthy, but will only mark the container as unhealthy after 12 consecutive failures. This probe ensures the service remains healthy during operation.
As some endpoints might need longer time to start up the container and initialize the model, you can also specify a custom delay seconds to meet the requirements, simply select the Custom option and input the delay seconds.
Require approval to make replicas ready
You can specify whether to require approval to make replicas ready in the Advanced section. By default, the replicas will be ready immediately.
Pulling metrics from replica
You can specify whether to pull metrics from the replicas in the Advanced section. By default, the metrics will be pulled from the replicas.
Header-based replica routing
You can specify the header-based replica routing in the Advanced section. By default, the requests will be load balanced across all the replicas.
Private image registry auth (optional)
If your container image is hosted in a private image registry, you can specify the registry auth in the Advanced section.
Log Collection
You can specify whether to collect logs from the replicas in the Advanced section. By default, the option is synced with the workspace setting.
Use Dedicated Endpoints
This document will go through the basics of using your dedicated endpoints in Lepton. If you do not have a dedicated endpoint yet, you can learn how to create one in the create dedicated endpoints guide.
Calling your endpoint
After your dedicated endpoint is created, you can start making API requests to it from anywhere.
Through client SDK
You can use our client SDK to make API requests to your endpoint easily.
- Install client SDK
First, you need to install the Python SDK in your own project:
pip install leptonai
- Get API token
You can find your workspace API token in the workspace settings page.
Set this token as the LEPTON_API_TOKEN environment variable.
export LEPTON_API_TOKEN=<your-api-token>
- Make API Request
import os
from leptonai.client import Client

api_token = os.environ.get('LEPTON_API_TOKEN')
client = Client("your-workspace-id", "your-endpoint-name", token=api_token)

result = client.run(
  inputs="I enjoy walking with my cute dog",
  max_new_tokens=50,
  do_sample=True,
  top_k=50,
  top_p=0.95
)

print(result)
Through endpoint URL
You can also call the endpoint URL directly with HTTP requests.
- Get your endpoint URL and API token
You can get the endpoint URL from the endpoint details page in the dashboard.
- Make API Request
Now you can call your endpoint directly with the URL and API token:
curl -X 'POST' \
  'your-endpoint-url' \
  -H 'Content-Type: application/json' \
  -H 'accept: application/json' \
  -H "Authorization: Bearer your-api-token" \
  -d '{
  "inputs": "I enjoy walking with my cute dog",
  "max_new_tokens": 50,
  "do_sample": true,
  "top_k": 50,
  "top_p": 0.95
}'
Logs
Logs are useful for debugging your endpoint, you can view the logs either in the dashboard or through the CLI. For example, you can get the logs through the CLI like this and logs will be streamed to your terminal:
lep deployment log --name mygpt2
Metrics
You can easily view metrics chart of your endpoint in the dashboard. Now we support QPS, latency, GPU memory usage and GPU temperature metrics.
Billing
Dedicated endpoints are billed by the resource usage of the endpoint. (calculated by minutes)
// Basic billing formula:
Cost = Machine unit price * Machine hours * Replica count
You can find the details of each machine type in Lepton AI pricing page.